Track Work

I found this pic with the caption: “Portage Flyer passengers focus their attention on the train as they stretch their legs on the station platform in the background while we focus ours on this odd little home-built turntable at the east end of the line. It was built around an old salvaged swing-bearing from a Cat excavator, as was its partner at the western terminus. They are only used during steam season in July and August, as the diesel is a bit too long and heavy for this one in particular, which can be a bit of a bear for two people to push by hand, even with the little tea-kettle on it. Huntsville and Lake of Bays Railway. GE 25-Ton. HLBR 3. Portage Flyer. Fairy Lake Station, Huntsville, Ontario, Canada, October 05, 2013, W. D. Shaw.” Nice detail!! Beside the mini-turntable, check out the turnout points and hand throw.
Remains of a trestle on the old railroad bed from Golden Spike to Lucin. You see clearly how the bridge ties were bolted down to the bridge beams. You can clearly see the nut-bolt-washers.


So…You’re looking at putting in a double slip switch? I’m not sure of the location, but the foreground of this shot gives some great details in the point rails and guard rails.
This is a 2 foot gauge 3-way turnout. I’ve seen a few narrow gauge and branch line turnouts that operate similar to this one. In lieu of typical point rails. The lead rails are aligned with the three rout rail options. I’ve thought about how this could be implemented in HO – for a two route turnout, you could have stops on the outside that keep the tracks aligned. But aligning with the center route is a bit tricky.


Here’s a more standard 3-route turnout where two sets of point rails determine the route. It still requires a little thought in how to correctly set the point rails. At least in this case, you can bang into the rails on either side rather than depending on correct alignment.
Check out this dual gauge track where the narrow gauge veers into the center of the standard gauge in the foreground. Then the turnout accommodates both gauges. The frog and guard rails are fascinating.


Here’s a great prototype example of a wood plank road crossing. Back in the day, these were prominent on backroads – had to approach the crossing slowly or you’d bounce your suspension system pretty hard. And, often the boards would bounce and teeter-totter a bit.
Here’s a more modern wood plank crossing. Note the bolt pattern. This is smoother and more stable – you have to slow a bit, but you don’t have to crawl over this crossing.


This is a modern remote control derail. Notice how the industrial spur goes uphill. This derail is designed to prevent any runaway freight cars from rolling down the hill onto the mainline. The derail appears to be simple turnout points that direct the wheels either to the spur track lead, or off to the left where the short stub tracks leads the wheels off the rail. It appears to have a switch motor on the right. Notice the concrete ties on either side of the derail section. Concrete ties would typically be used on modern mainline. I’m not sure what sort of branch or spur would require concrete ties.
Conjecture says this is a buffer stop at the end of a station platform. This appears to be a light gauge rail on a narrow gauge line. There’s tracks on the other side of the station. There’s a bit of creativity in the track crew member(s) that came up with this wheel stop.


I’ve seen this image before – what would cause the track to snap as if it were brittle? In studying the track, there appears to be a weld just left of the crack. Possibly the process of welding the tracks both caused the steel to go brittle, and caused faults in the steel near the weld. I big pull from contracting rails…and snap! Best explanation I could come up with. Check out the ballast.
Street tracks! That appears to be a stone street. There doesn’t appear to be a consistent size to the stones like what cobblestones would have. On the left, it appears they put a thin layer of asphalt over the stone – which of course lends itself to pot-hole development! I don’t see movable points on the two turnouts. I think you can go reverse through the turnouts from either lead, but it directs you out only one way. The left turnout appears to always push you to the diverging route. I can’t see the right one clearly, but it appears to always push you to the straight main route. What a great view of the details of rail in stone roadbed!


Another pic of street rails with similar details. Again, stone or cobblestone street. I think this one may be cobblestone because there are in general two sizes of stone (some stones being chipped or broken to fit in odd spaces). The straight route appears to be abandoned – it doesn’t quite make it to where there would be a turnout between the routes. And the diamond has had flange slots for the straight route filled in.
From the pic title, this is obviously a rail entrance to an old scrap yard – except the scrap has been cleared! It also looks like they may have pulled up the track in the scrap yard, while leaving track as abandoned outside the gate. That’s a double slip switch just before the gate. Great details with the fence gate, and rail stops on the right.


This is just a great shot of track and a trailer train truck. The Barber S-2 trucks were originally introduced in the ‘40s – rated at 70 tons with friction bearings. But, they became much more popular in the ‘60s when roller bearings were added and they were beefed up to a 100 ton rating. This particular truck was cast for the L&N in 1975. Since the pic was taken in 2012, this truck seems to have held up well. Note the ballast – modern ballast can typically cover the ties.
Nice view of a yard ladder. In the foreground, you get a look at a frog with one side of the turnout removed. They pull the left point rail while spiking the right point to a permanent diverging route.


If you need the detail for a diamond between two heavy rail lines, this is the perfect pic. Check out the cast corners and the bolted plates. That’s an old coaling tower in the background. The route under the coaling tower appears to still be in use, while the crossing route shows rust on the top of the rails.
This is an abandoned bridge on the Canadian Pacific. Look at how deep the bridge ties are! And, the bridge ties are placed much closer together (as typical with most bridges). Bridge and stone abutment detail is nice! The top of the stone abutment appears to be at the level of the top of the ties. I’ll have to check and see if this is typical – maybe it keeps the ballast in place. But if the edges are that high, then they probably have some form of drainage system on either side of the track with an abutment this long. (Or maybe not!)


I like the wheel stops in this photo. The timbers used for stops appear to be much larger than standard ties. They might be bridge ties given the depth, but I’m thinking these timbers are big for even bridge ties. Also note the ballast in the yard.
This is the Southern RWY in Austell, Georgia, 1972. I picked this photo because of the great look at the ballast, ties, and rail (colors). The added bonus is seeing the conductor (I’m guessing) reaching out to grab new orders on the fly. Also, you get a good look at some of the details on the caboose. Notice the caboose truck has roller bearings, and leaf springs instead of coil springs


…since we’re looking at ballast, ties, & rails…while passing orders on the fly! – CB&Q, looks like an EMD E unit!
This is a great photo for trackwork and details around the right-of-way. Photo of Milwaukee Road (East) by John F. Bjorklund, Center for Railroad Photography & Art.


Snow at dusk – I had to throw this in with the weather turning cold on us. A lot of great detail here – if you’re modeling a light snow scene. It looks like there’s a mechanical connection form the tower to the turnout on the right of the tracks. The track signal is nice as is the dwarf signal between the tracks. This pic is part of the Wallace W. Abbey collection at the Center for Railroad Photography & Art.
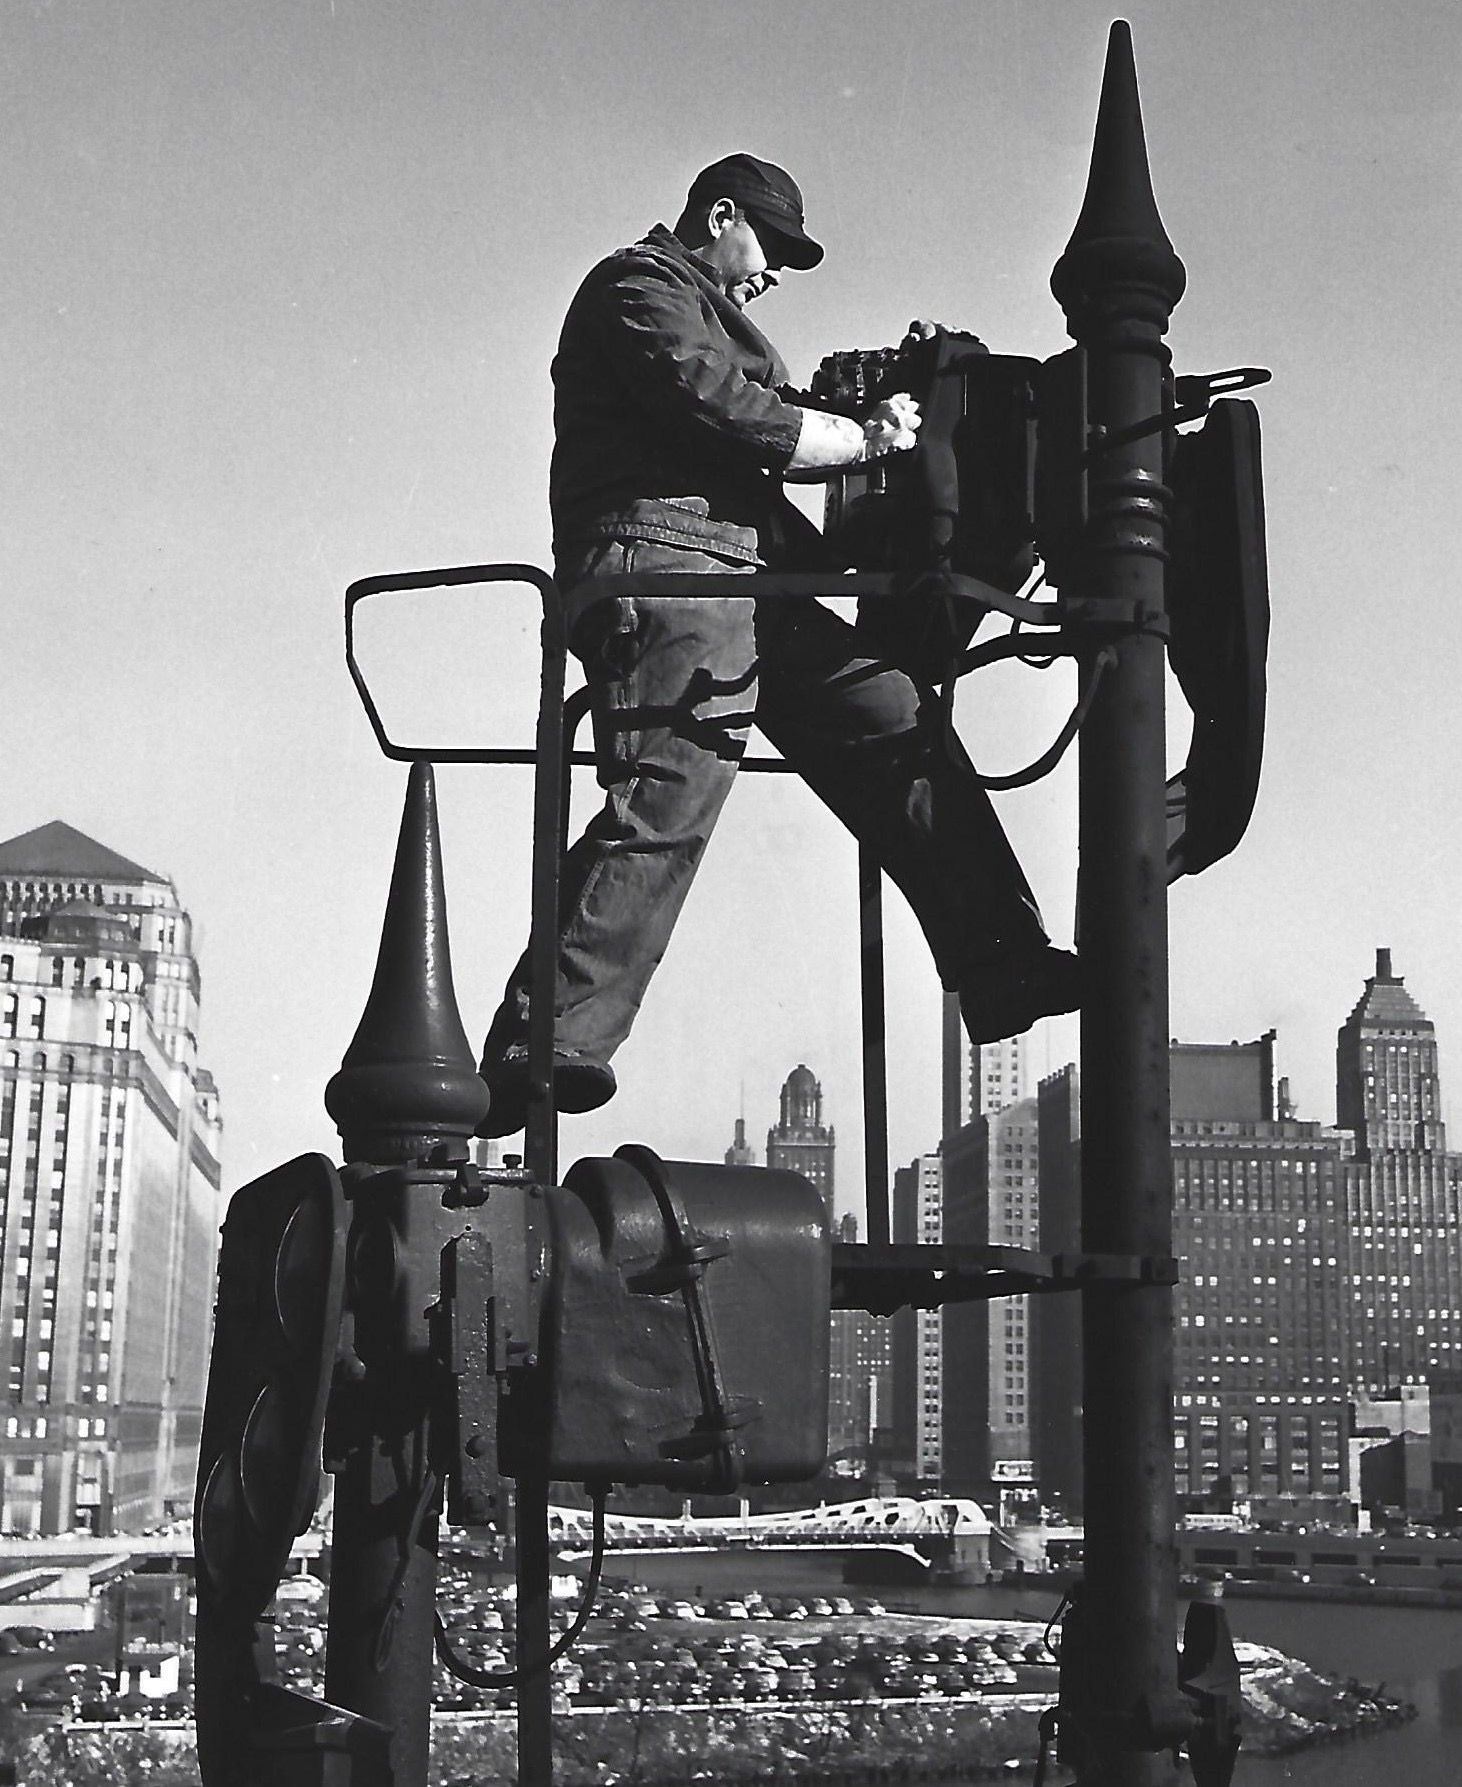
Since we’re looking at signals, here’s some details up at the head. And, how you perform maintenance. I’d like to know where this is – look at the view of the city in the background. It looks like this is on elevated tracks, or possibly an elevated lead to a bridge. I’m guessing Chicago or New York.

Here’s a gatekeeper’s shanty for early 20th century crossings.
Another early 20th century crossing shanty. This is a PRR crossing at Hall Street, Grand Rapids, MI, 1949 (so just barely the early part of the century).


A quite spectacular scene where 3 Rio Grande steamers tug a train up the grade. This is narrow gauge, but check out the track and roadbed. It looks like the recently ballasted, and then ran a Jordan spreader (or such) to shape the roadbed.
…Anyways – I can study track almost forever! I set aside numerous track photos just to keep this study within reason. So much can be understood about the railroad and the local activity from the track and the surrounding detail.
Thx,
Kevin
Comments